Wednesday, February 27, 2013

Thrifting Success

This weekend I made the trek out to Gardendale to a fantastic flea mall - 2 floors jam packed with treasures.  I snagged a mid-century-ish orange chair for only $15.  We originally had this dusty green chair in the corner of the guest room.


I love the shape, but the green did get lost against the wall colour, so its nice to add a pop of contrast.  Mo seems to like it too.  The green chair now has a new home in the other guest room - also known as home of the lost furniture.  It's such a mish mash in there that at some point I'm going to have to put some serious time and effort into bringing together.


Next up was this magazine rack for a crisp $18. 

 
You can see the great shape better from the side.
 
 
How could I not love the top with its geometric pattern.  It reminded me of something you'd find in Urban Outfitters.


I also picked up a couple of glass bottles and some wall sconces that have made the spray painting list. 
 
Kate
xxx

Sunday, February 24, 2013

Super Size Cross Stitch

Do you ever start a project and fall in love with it immediately?  That's exactly how I felt throughout my latest project.  Something about it was just so therapeutic.

Let me start by saying, I have never cross stitched before.  Ever.  I haven't let that stop me in any of my other projects (thank goodness for YouTube) and I wasn't about to start now.

All of the funky/retro cross stitch I have seen on Etsy and Pinterest got me thinking about creating my own version.  This one by Glitter and Wit really caught my eye. 


But I wanted something bigger.  No, make that BIGGER!

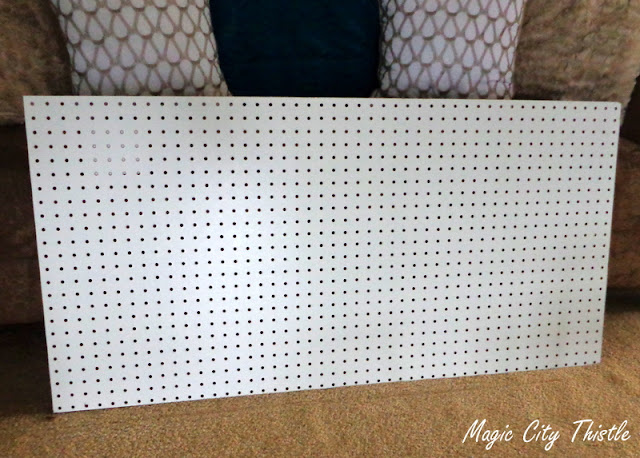
I started thinking about what type of canvas I could use to create my super sized cross stitch and came up with the idea of a pegboard.  It is cheap, can be cut to size and has the holes pre drilled.  My next stop was Home Depot where I picked up this 2' by 4' board for only $6.


By this point my imagination was in overdrive. I had a million different ideas about what image to create, and still might splash out on another peg board just so I can try some more options:

spell out Love
or Guest (to go above the bed in the guest room)
or Wash for the laundry room
an arrow with Exit below it for the hallway
an allover pattern - maybe a chevron (could also be used as a headboard)
paint the board a dark colour and use a white yarn (this would better disguise the remaining holes)

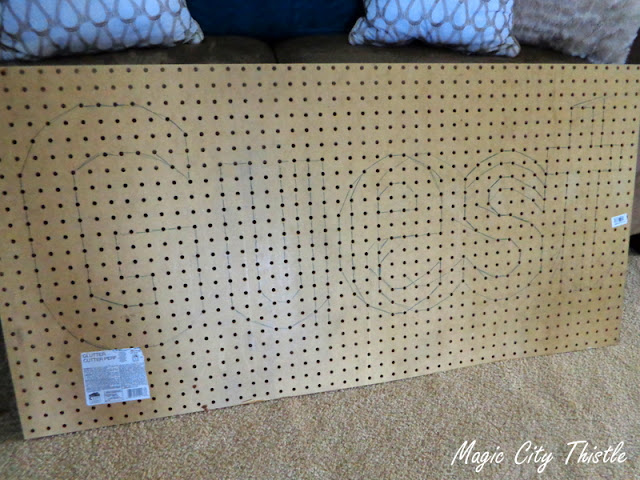
I initially decided to go with "Guest" and I started out by trying to sketch the letters onto the back of the board. 


Mistake number one.  I quickly learned that a grid was the way to go to work out what I was going to cross stitch.  I counted out the holes on my pegboard and made a grid by resizing an Excel sheet with the same number of squares.  I really wanted it to look like script, so changed my plan to "hello".  I had bought some brown fuzzy yarn about 6 months ago from Big Lots for only $1 a ball.  As with most things I end up buying, I had no idea at the time what I was going to use it for, but the thickness and texture were perfect for my over sized cross stitch.

Like a giant fuzzy caterpillar.


After the first night it was beginning to take shape.  I'm sure someone who was an accomplished cross-stitcherererer could knock this out in a night.  The fuzz on the carpet when I was finished was crazy, it looked like little Murph had been shaved! I'm amazed there was an fuzziness left! 


It took me 2 nights in total to complete it - luckily it was easy to pull out any mistakes or areas that didn't look quite right and correct them.  Had I had more yarn I would have made the Ls a little taller and had planned to do an extended loop into the H and out of the O. 


I do love how it turned out, especially as the whole thing came in under $10.


A super sized canvas called for an extra thick yarn.


 New here, thanks for stopping by.  You can stay connected with me through Bloglovin:
 
Follow on Bloglovin
 
 Google Friend Connect (check bottom right in the side bar)
 
Or see my likes and loves on Pinterest
 
Follow Me on Pinterest  
 
Kate
xxx


Wednesday, February 20, 2013

Red or Dead

In an effort to get a few more things checked off the "To Do List" (more on that HERE) I splashed out a whole $6.99 on this West Elm pendent light (bargain of the week!).  They had a free shipping event a couple of weeks ago, and today it finally arrived.  They still have some left in black, but it would be so easy to spray paint in whatever colour you wanted.


The plan is to switch our the strip light above the sink and hang this in its place.  At 8 x 8.25 its the perfect size for the space.


Now all we need is someone to wire it in!

Kate
xxx

Sunday, February 17, 2013

Mustache Hanger

I mustache you a question (I promise that's the first and last mustache pun) - What do you do with the gazillion wire hangers that have built up in your closet?  If you're me, make them into giant mustaches of course!


I'm not sure why, but I could not stop laughing the whole time I was making this.  Apparently there is something inherently funny about a giant metal mustache.  Who would have thought it!

If you want a good chuckle and to recreate the mustache hanger, you will need:


I made the first one with just my hands and it hurt.  A lot.  So I would definitely recommend starting with the pliers.

First bend the hanger in half upwards, like this:


Pull both ends back to their original position, and press the hook part of the hanger downwards.


Next you want to turn the ends upwards to create the flick at the end of the mustache.  Don't worry if it looks a little wonky at this stage, the wire is very pliable and will soon begin to take shape.


Then you can use the can of soup to mould the top curve of the mustache around (please note, no chicken noodles were hurt in the making of this!).


Then it's just a case of playing with your proportions and smoothing out the lumps and bumps until you are happy with the shape.


The great thing about the mustache hanger is that they are still completely usable, and are especially good for strappy tops because the little flick at the end of the mustache helps to hold the straps in place (even better than the regular wire hanger).

Plus they are free - who doesn't have some old wire hangers lurking in their wardrobe.

New here, thanks for stopping by. You can stay connected with me through Bloglovin:
Follow on Bloglovin
Google Friend Connect (check bottom right in the side bar)
Or see my likes and loves on Pinterest
Follow Me on Pinterest
Kate
xxx

Friday, February 15, 2013

H & Mmmm

Guess what arrived in our postbox last weekend (thanks mum!).


Our H&M cushion covers are finally here.  Can you believe they were only about $5 each (I had to order them from the UK site because they don't have a US online shop, yet!  The campaign starts now).  I love the bold geometric print and the dark grey colour.  The back is a teeny tiny repeat of the same pattern.

Luckily I had a pair of old cushions I'd been trying to sell on Craigslist for weeks (come on Birmingham, don't you know a good deal when you see one?) that were a perfect fit.


It's just a jump to the left:


And then a step to the right (see how I whipped up my own Captain Mirror HERE):


We have been making do with a couple of Euro pillows and a pair of side tables:


What a difference a headboard (more on that bargain find HERE), a pair of nightstands and some jazzy (yeah, that's right, i said jazzy) cushions can make. 


You can see I took the picture above the bed down.  I'm hoping having to look at the big blank wall will spur me on to finding/making something completely amazing to take its place.

Kate
xxx

Wednesday, February 13, 2013

Half Bath Sneak Peek

The half bath has been a sorry sight, pretty much since we moved in. Initially we used the ugly vanity to wash the paint brushes and rollers, until we couldn't stand to look at it any more, and we took the whole thing out completely.  The drawers were all jacked up and the top was in a shoddy condition.  Its fate was sealed and out it went.


The wall colour was a kind of dusty apricot.

 
This room is small (just a loo and a sink), so no amount of light coloured paint or ambient lighting was going to make it look any bigger.  We decided to go dark. Really dark.
 
 
We still have a way to go with installing the new vanity, hanging shelving or some sort of storage above the loo, creating an art wall, replacing all of the hardware.  And the list goes on.  Luckily I have found lots of good inspiration:


 Kate
xxx 
 

Monday, February 11, 2013

Scrabble Magnet = 830 points

Oooft, Monday again!  How did that happen?

This weekend was spent dodging thunderstorms, playing with the little man and watching the Grammys (still got it Johnny, still got it!).  Busy, busy, busy.  In between this hectic schedule, I did manage to squeeze in a quick project or two.

I was mooching around Dollar Tree when I stumbled upon this little treat.  Ignore all the bright colors and weird vent cover nonsense, ultimately it's a magnetic sheet.  For $1.  In the basket it went.


I decided to try and make a dishwasher "clean/dirty" magnet using an old Scrabble set I'd picket up a few months ago from a flea mall.  I'm not sure where the inspiration came from but really, nobody likes poking around in the dishwasher to see if its packed with clean or dirty dishes.  Guaranteed to end in a ketchupy finger. 


I cut a slice of the magnetic vent cover sheet and hot glued the clean/dirty scrabble tiles. 

Ta da!


And shock horror, it's actually being used!!


Kate
xxx

Friday, February 8, 2013

Nuts!

I couldn't resist sharing my latest buy from Etsy (Victoriana Sedona).  Get a look at these golden nuggets of amazingness.  I have no idea where I'm going to put them, or what on earth I'm going to use them for, but when has that ever stopped me before.

Seriously, no home is complete without at least a couple of golden walnuts.  No really.


I wonder whether you could spray paint some real walnuts gold?  Or would that end in mouldy nastiness?  Ain't no body got time for mouldy nuts! 

Kate
xxx

Wednesday, February 6, 2013

Fan it up

This has got to be the easiest update I've done - mainly because all I had to do was buy the fan.  I had absolutely nothing to do with wiring it in, so no tutorial here I'm afraid.  Me and anything electrical is probably not a good combination.  Luckily my father in law is super handy and had it installed in record time.  Here's the good old before and after.

Before - fugly.  Ok, so you can't really see much of the original fan, but you get the idea.


After - ooooh, swit swoo, that is one sleek looking fan.


Kate
xxx

Monday, February 4, 2013

Aye aye Capt'n

I knew these trays would come in handy, I just knew it.  Well, I knew they were cheap (on clearance at Target for a measly $4 each) so I snapped them up.


They've been hanging around in a box in the basement ever since then, just waiting for their big transformation.  Oh yes, they knew their time would come.

Now for the plan: I've seen lots of variations of the Captain Mirror.  From Ballard Designs, ringing in at a whopping $449:


To Horchow at a budget busting $725


The first thing I needed was a mirror to insert into the center of the tray.  I measured the tray and it was an awkward 13.5" across.  Michaels had a craft mirror at 12" and Hobby Lobby had a candle mirror at 13".  Ideally I would have gone for the 13" to leave as little a gap around the outside as possible but it was so heavy I didn't want to put any extra strain on the straps or bamboo tray (notorious for splitting).

The 12" turned out great, and I kind of like the extra border around the outside.  It was as simple as hot gluing it into the center of the tray.

Now for the straps/belts.  I measured the height of the tray and around the bottom half to make sure the buckles would meet the tray at the right point.  With tape measure in hand I hit up J&J Junk (more on that here) and found these 2 belts for only 50c.  That's right, just 25c each and unbelievably both are real leather (one is even Tommy Hilfiger).
 
 
See - I told you so.
 
 
I hot glued one belt around the bottom of the tray, then attached the second belt to loop around the top so the buckles were level on each side.


Here is my version of the Captain Mirror for under $10.

 
I used a chunky acrylic hook I bought, for I think $1 at a flea mall, to hang the mirror.
 
 
I love how the worn leather belts look.
 
 
Here's the captain in pride of place in our master.
 
 
Kate
xxx