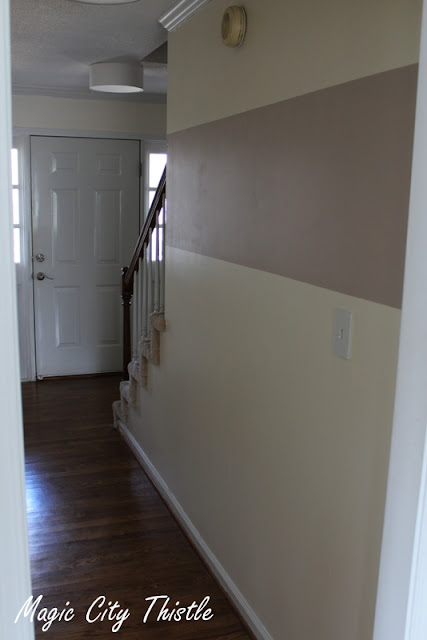
I knew we would be painting it, and we quickly updated it from the dark green to a bright cream. I loved the crisp clean look it gave, but even I have to admit it looked a little plain Jane - even with the introduction of the cute Loch Ness Monster print (more on that HERE) and a little Welcome sign (more on that HERE).
The wall by the stairs, in particular, was crying out for something. Anything!!
I masked out my line with painters tape. I read a great tip on Emily Clarks amazing blog for painting stripes: paint along the outside with an almost dry brush as this seals the edges and prevents bleeding under the tape. (Please ignore the hideous smoke detector - it's on the list to be replaced!)
I couldn't wait to whip the tape off. Sure enough, the lines were nice and sharp.
This pic was taken on a trip to Tampa. Sadly this is as close as we got to that yacht!
The colour was just what I wanted, and I love any excuse to get my photos out of a box and onto the wall.
Kate
xxx


I love the one wide stripe...and the pictures lined up along the stripe are a great look!! Thanks for sharing your $10 project!
ReplyDeleteI love those samples, there is a lot more paint in them than you would think!!
~ Darlene
Thanks Darlene, there really is a lot, and for only $3 - can't beat it.
DeleteI LOVE this! What a great way to add some flair to a boring wall! Love it, pinning for sure!
ReplyDeleteSimple and striking,the stripe sets of your pictures perfectly.
ReplyDeleteI wasn't too sure about the wide stripe until I saw the finished look with your photographs added. It's beautiful
ReplyDeleteLove that look...simple , restful repeat pattern in the frames.
ReplyDeleteHave a great day!
Deb@LakeGirlPaints
Great job, I love the accent stripe. It really makes the wall pop! Found you from House of Hepworths link party.
ReplyDelete